
Poradnik Windows answer file – tworzenie autounattend.xml
W poprzednim artykule Packer poradnik dla początkujących – konfiguracja środowiska Windows w sekcji “Kopia testowa/trial Windows ISO” znajdziemy informację skąd pobrać wersję systemu operacyjnego. Tutaj rozwiniemy odrobinę temat a mianowicie jak utworzyć i skonfigurować plik odpowiedzi autounattend.xml lub unattend.xml dla Windows 10. Plik ten służy nam do nienadzorowanej instalacji dla klientów Windows. Dzięki uprzednio tak przygotowanemu pliku autounattend.xml możemy…


W poprzednim artykule Packer poradnik dla początkujących – konfiguracja środowiska Windows w sekcji “Kopia testowa/trial Windows ISO” znajdziemy informację skąd pobrać wersję systemu operacyjnego. Tutaj rozwiniemy odrobinę temat a mianowicie jak utworzyć i skonfigurować plik odpowiedzi autounattend.xml lub unattend.xml dla Windows 10. Plik ten służy nam do nienadzorowanej instalacji dla klientów Windows.
Dzięki uprzednio tak przygotowanemu pliku autounattend.xml możemy zapomnieć o ręcznym klikaniu w przyciski podczas instalacji.
W pliku autounattend.xml może znajdować się konfiguracja kont lokalnych, dyskach, partycjach czy instalacji dodatkowych skryptów podczas inicjalizacji Windows.
Instalacja
Pierwsze co musimy zrobić to zainstalować program “Windows Assessment and Deployment Kit (Windows ADK)” ze strony Download the Windows ADK for Windows 10, version 2004
Następnie zaznaczamy opcję “Deployment Tools”

Konfiguracja Windows System Image Manager
Tutaj muszę wtrącić małą dygresję abyśmy mogli pracować dalej. W następnych krokach będziemy potrzebowali plik “Install.WIM“, który to będziemy właśnie wykorzystywać w programie “Windows System Image Manager”. Informacje jak uzyskać plik INSTALL.WIM z Windows 10 znajdziecie tutaj Poradnik Windows Konwertowanie Install.ESD na plik Install.WIM
Po instalacji z menu start wyszukujemy nazwę: “Windows System Image Manager”

Następnie musimy załadować wcześniej wspomniany plik INSTALL.WIM z sekcji “Windows Image”


Po poprawnym załadowaniu pliku WIM naszym oczom ukażą się komponenty dzięki , którymi będziemy mogli decydować o budowanie naszego pliku autounattend.xml.

Dalej musimy utworzyć nowy plik odpowiedzi (Answer File)

Tworzenie pliku autounattend.xml
Dodajemy minimalny zestaw komponentów, który będziemy używać w naszym pliku. W moim przypadku są to:
Komponent amd64_Microsoft-Windows-International-Core-WinPE_neutral
Zawiera komponenty językowe

Komponent amd64_Microsoft-Windows-Setup_neutral
Zawiera komponenty partycji dysku dla systemu operacyjnego ustawienia Zapory sieciowej. Tutaj zatrzymamy się na dłużej gdyż musimy poprawnie skonfigurować partycję systemu operacyjnego pod Windows 10.
Dodajemy klucz “DiskConfiguration” i modyfikujemy wg poniższego schematu:


<DiskID>0</DiskID> <WillWipeDisk>true</WillWipeDisk> </Disk>
Dalej tworzymy dwie partycje w kluczu “Create Partitions” na utworzonym dysku:


Konfiguracja partycji nr 1:

Konfiguracja partycji nr 2:

<CreatePartitions>
<CreatePartition wcm:action="add">
       <Order>1</Order>
       <Size>200</Size>
       <Type>Primary</Type>
</CreatePartition>
<CreatePartition wcm:action="add">
      <Extend>true</Extend>
      <Order>2</Order>
      <Type>Primary</Type>
</CreatePartition>
Dalej tworzymy dwie partycje w kluczu “Modify Partitions” na utworzonym dysku:

Konfiguracja partycji nr 1:

Konfiguracja partycji nr 2:

<ModifyPartitions>
    <ModifyPartition wcm:action="add">
        <Active>true</Active>
        <Format>NTFS</Format>
        <Label>System</Label>
        <Order>1</Order>
        <PartitionID>1</PartitionID>
    </ModifyPartition>
    <ModifyPartition wcm:action="add">
        <Format>NTFS</Format>
        <Order>2</Order>
        <PartitionID>2</PartitionID>
        <Label>WindowsOS</Label>
    </ModifyPartition>
</ModifyPartitions>
Cała konfiguracja komponentu amd64_Microsoft-Windows-Setup:
 <component name="Microsoft-Windows-Setup" processorArchitecture="amd64" publicKeyToken="31bf3856ad364e35" language="neutral" versionScope="nonSxS" xmlns:wcm="http://schemas.microsoft.com/WMIConfig/2002/State" xmlns:xsi="http://www.w3.org/2001/XMLSchema-instance">
    <DiskConfiguration>
        <Disk wcm:action="add">
            <CreatePartitions>
                <CreatePartition wcm:action="add">
                    <Order>1</Order>
                    <Size>200</Size>
                    <Type>Primary</Type>
                </CreatePartition>
                <CreatePartition wcm:action="add">
                    <Extend>true</Extend>
                    <Order>2</Order>
                    <Type>Primary</Type>
                </CreatePartition>
            </CreatePartitions>
            <ModifyPartitions>
                <ModifyPartition wcm:action="add">
                    <Active>true</Active>
                    <Format>NTFS</Format>
                    <Label>System</Label>
                    <Order>1</Order>
                    <PartitionID>1</PartitionID>
                </ModifyPartition>
                <ModifyPartition wcm:action="add">
                    <Format>NTFS</Format>
                    <Order>2</Order>
                    <PartitionID>2</PartitionID>
                    <Label>WindowsOS</Label>
                </ModifyPartition>
            </ModifyPartitions>
            <DiskID>0</DiskID>
            <WillWipeDisk>true</WillWipeDisk>
        </Disk>
    </DiskConfiguration>
    <ImageInstall>
        <OSImage>
            <InstallTo>
                <DiskID>0</DiskID>
                <PartitionID>2</PartitionID>
            </InstallTo>
        </OSImage>
    </ImageInstall>
    <UserData>
        <ProductKey>
            <Key>VK7JG-NPHTM-C97JM-9MPGT-3V66T</Key>
            <WillShowUI>Never</WillShowUI>
        </ProductKey>
        <AcceptEula>true</AcceptEula>
        <FullName>virtuallabspl</FullName>
        <Organization>virtuallabspl</Organization>
    </UserData>
    <EnableFirewall>false</EnableFirewall>
</component>
Dodajemy klucz “ImageInstall/OSImage” i modyfikujemy wg poniższego schematu:
Klucz OSImage

Klucz InstallTo

<OSImage>
    <InstallTo>
        <DiskID>0</DiskID>
        <PartitionID>2</PartitionID>
    </InstallTo>
</OSImage>
Dodajemy klucz “UserData” i modyfikujemy wg poniższego schematu:

Klucz ProductKey

<UserData>
    <ProductKey>
        <Key>VK7JG-NPHTM-C97JM-9MPGT-3V66T</Key>
        <WillShowUI>Never</WillShowUI>
    </ProductKey>
    <AcceptEula>true</AcceptEula>
    <FullName>virtuallabspl</FullName>
    <Organization>virtuallabspl</Organization>
</UserData>
Komponent amd64_Microsoft-Windows-Shell-Setup_neutral
Zawiera komponenty sekcji Menu Start oraz nazwę komputera w moim przypadku jest to “Packer“

Komponent amd64_Microsoft-Windows-International-Core_neutral
Zawiera komponenty językowe spersonalizowane dla konta. Sekcja ta jest bardzo ważna gdyż po instalacji Windows 10 należy zdefiniować język klawiatury. Bez tej procedury będziemy zmuszani do ręcznego wyboru czego nie chcemy przy automatyzacji.

Komponent amd64_Microsoft-Windows-Shell-Setup_neutral
Zawiera komponenty zachowania się systemu operacyjnego po jego instalacji czy też tworzenie konta lokalnego.

Dodajemy klucz “AutoLogon” i modyfikujemy go wg poniższego schematu:
Tuta tworzymy konto lokalne w moim przypadku o nazwie “virtuallabspl”. Pole LogonCount pozwala automatycznie zalogować się do OS utworzonym kontem “N” razy, tutaj 2.

Podajemy hasło dla naszego konta, które zostanie użyte podczas automatycznych logowań.

<AutoLogon>
    <Password>
        <Value>UwB0AGEAcgB0ADEAMgAzACEAUABhAHMAcwB3AG8AcgBkAA==</Value>
        <PlainText>false</PlainText>
    </Password>
    <LogonCount>2</LogonCount>
    <Enabled>true</Enabled>
    <Username>virtuallabspl</Username>
</AutoLogon>
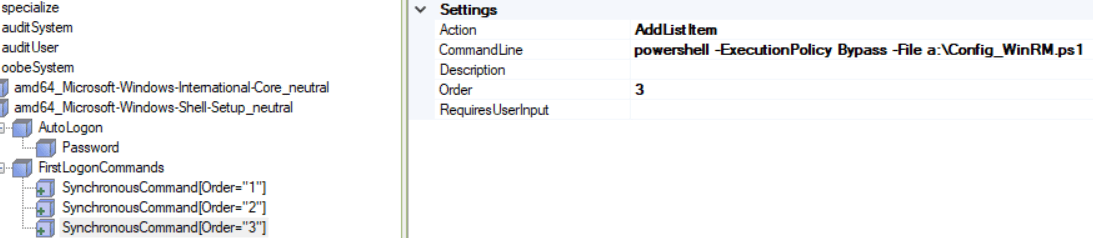
Dodajemy klucz “FirstLogonCommands” oraz pod klucz skryptu i modyfikujemy go wg poniższego schematu:
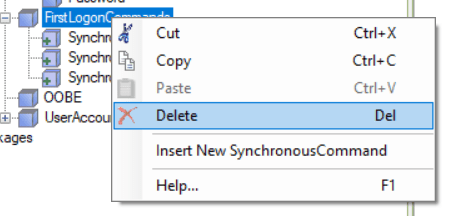
W moim przypadku dodaje trzy skrypty, które będą uruchomione podczas pierwszego uruchomienia systemu operacyjnego:
Skrypt nr 1: Instaluje “Vmware Tools”

Skrypt nr 2: Zasady wykonywania programu PowerShell

Skrypt nr 3: Skrypt konfigurujący usługę WinRM
<FirstLogonCommands>
    <SynchronousCommand wcm:action="add">
        <Order>1</Order>
        <CommandLine>e:\setup64.exe /S /v "/qn ADDLOCAL=ALL"</CommandLine>
    </SynchronousCommand>
    <SynchronousCommand wcm:action="add">
        <Order>2</Order>
        <CommandLine>powershell.exe Set-ExecutionPolicy Unrestricted -force</CommandLine>
    </SynchronousCommand>
    <SynchronousCommand wcm:action="add">
        <Order>3</Order>
        <CommandLine>powershell -ExecutionPolicy Bypass -File a:\Config_WinRM.ps1</CommandLine>
    </SynchronousCommand>
</FirstLogonCommands>
Dodajemy klucz “OOBE” i modyfikujemy go wg poniższego schematu:

<OOBE>
    <ProtectYourPC>3</ProtectYourPC>
    <HideEULAPage>true</HideEULAPage>
    <HideLocalAccountScreen>true</HideLocalAccountScreen>
    <HideOEMRegistrationScreen>true</HideOEMRegistrationScreen>
    <HideWirelessSetupInOOBE>true</HideWirelessSetupInOOBE>
    <HideOnlineAccountScreens>true</HideOnlineAccountScreens>
</OOBE>
Dodajemy klucz “UserAccounts/AdministratorPassword” i modyfikujemy go wg poniższego schematu:
Nadajemy hasło dla naszego konta.

Dodajemy klucz “UserAccounts/LocalAccounts” i modyfikujemy go wg poniższego schematu:
Tutaj modyfikujemy zawartość podając nazwę naszego konta oraz przypisując go do grupy “Administrators”

Nadajemy hasło
<UserAccounts>
    <AdministratorPassword>
        <Value>QQBkAG0AaQBuAGkAcwB0AHIAYQB0AG8AcgBQAGEAcwBzAHcAbwByAGQA</Value>
        <PlainText>false</PlainText>
    </AdministratorPassword>
    <LocalAccounts>
        <LocalAccount wcm:action="add">
            <Password>
                <Value>UwB0AGEAcgB0ADEAMgAzACEAUABhAHMAcwB3AG8AcgBkAA==</Value>
                <PlainText>false</PlainText>
            </Password>
            <DisplayName>virtuallabspl</DisplayName>
            <Name>virtuallabspl</Name>
            <Group>Administrators</Group>
        </LocalAccount>
    </LocalAccounts>
</UserAccounts>
<AutoLogon>
    <Password>
        <Value>UwB0AGEAcgB0ADEAMgAzACEAUABhAHMAcwB3AG8AcgBkAA==</Value>
        <PlainText>false</PlainText>
    </Password>
    <LogonCount>2</LogonCount>
    <Enabled>true</Enabled>
    <Username>virtuallabspl</Username>
</AutoLogon>
Cała konfiguracja komponentu amd64_Microsoft-Windows-Shell-Setup
<component name="Microsoft-Windows-Shell-Setup" processorArchitecture="amd64" publicKeyToken="31bf3856ad364e35" language="neutral" versionScope="nonSxS" xmlns:wcm="http://schemas.microsoft.com/WMIConfig/2002/State" xmlns:xsi="http://www.w3.org/2001/XMLSchema-instance">
<OOBE>
    <ProtectYourPC>3</ProtectYourPC>
    <HideEULAPage>true</HideEULAPage>
    <HideLocalAccountScreen>true</HideLocalAccountScreen>
    <HideOEMRegistrationScreen>true</HideOEMRegistrationScreen>
    <HideWirelessSetupInOOBE>true</HideWirelessSetupInOOBE>
    <HideOnlineAccountScreens>true</HideOnlineAccountScreens>
</OOBE>
<UserAccounts>
    <AdministratorPassword>
        <Value>QQBkAG0AaQBuAGkAcwB0AHIAYQB0AG8AcgBQAGEAcwBzAHcAbwByAGQA</Value>
        <PlainText>false</PlainText>
    </AdministratorPassword>
    <LocalAccounts>
        <LocalAccount wcm:action="add">
            <Password>
                <Value>UwB0AGEAcgB0ADEAMgAzACEAUABhAHMAcwB3AG8AcgBkAA==</Value>
                <PlainText>false</PlainText>
            </Password>
            <DisplayName>virtuallabspl</DisplayName>
            <Name>virtuallabspl</Name>
            <Group>Administrators</Group>
        </LocalAccount>
    </LocalAccounts>
</UserAccounts>
<AutoLogon>
    <Password>
        <Value>UwB0AGEAcgB0ADEAMgAzACEAUABhAHMAcwB3AG8AcgBkAA==</Value>
        <PlainText>false</PlainText>
    </Password>
    <LogonCount>2</LogonCount>
    <Enabled>true</Enabled>
    <Username>virtuallabspl</Username>
</AutoLogon>
<TimeZone>Central European Standard Time</TimeZone>
<FirstLogonCommands>
    <SynchronousCommand wcm:action="add">
        <Order>1</Order>
        <CommandLine>e:\setup64.exe /S /v "/qn ADDLOCAL=ALL"</CommandLine>
    </SynchronousCommand>
    <SynchronousCommand wcm:action="add">
        <Order>2</Order>
        <CommandLine>powershell.exe Set-ExecutionPolicy Unrestricted -force</CommandLine>
    </SynchronousCommand>
    <SynchronousCommand wcm:action="add">
        <Order>3</Order>
        <CommandLine>powershell -ExecutionPolicy Bypass -File a:\Config_WinRM.ps1</CommandLine>
    </SynchronousCommand>
</FirstLogonCommands>
</component>
Cały widok drzewa pliku autounattend.xml

Cały plik autounattend.xml możecie znaleźć poniżej oraz na portalu GitLab i GitHub
<?xml version="1.0" encoding="utf-8"?>
<unattend xmlns="urn:schemas-microsoft-com:unattend">
    <settings pass="windowsPE">
        <component name="Microsoft-Windows-International-Core-WinPE" processorArchitecture="amd64" publicKeyToken="31bf3856ad364e35" language="neutral" versionScope="nonSxS" xmlns:wcm="http://schemas.microsoft.com/WMIConfig/2002/State" xmlns:xsi="http://www.w3.org/2001/XMLSchema-instance">
            <InputLocale>en-US</InputLocale>
            <SystemLocale>en-US</SystemLocale>
            <UILanguage>en-US</UILanguage>
            <UserLocale>en-US</UserLocale>
        </component>
        <component name="Microsoft-Windows-Setup" processorArchitecture="amd64" publicKeyToken="31bf3856ad364e35" language="neutral" versionScope="nonSxS" xmlns:wcm="http://schemas.microsoft.com/WMIConfig/2002/State" xmlns:xsi="http://www.w3.org/2001/XMLSchema-instance">
            <DiskConfiguration>
                <Disk wcm:action="add">
                    <CreatePartitions>
                        <CreatePartition wcm:action="add">
                            <Order>1</Order>
                            <Size>200</Size>
                            <Type>Primary</Type>
                        </CreatePartition>
                        <CreatePartition wcm:action="add">
                            <Extend>true</Extend>
                            <Order>2</Order>
                            <Type>Primary</Type>
                        </CreatePartition>
                    </CreatePartitions>
                    <ModifyPartitions>
                        <ModifyPartition wcm:action="add">
                            <Active>true</Active>
                            <Format>NTFS</Format>
                            <Label>System</Label>
                            <Order>1</Order>
                            <PartitionID>1</PartitionID>
                        </ModifyPartition>
                        <ModifyPartition wcm:action="add">
                            <Format>NTFS</Format>
                            <Order>2</Order>
                            <PartitionID>2</PartitionID>
                            <Label>WindowsOS</Label>
                        </ModifyPartition>
                    </ModifyPartitions>
                    <DiskID>0</DiskID>
                    <WillWipeDisk>true</WillWipeDisk>
                </Disk>
            </DiskConfiguration>
            <ImageInstall>
                <OSImage>
                    <InstallTo>
                        <DiskID>0</DiskID>
                        <PartitionID>2</PartitionID>
                    </InstallTo>
                </OSImage>
            </ImageInstall>
            <UserData>
                <ProductKey>
                    <Key>VK7JG-NPHTM-C97JM-9MPGT-3V66T</Key>
                    <WillShowUI>Never</WillShowUI>
                </ProductKey>
                <AcceptEula>true</AcceptEula>
                <FullName>virtuallabspl</FullName>
                <Organization>virtuallabspl</Organization>
            </UserData>
            <EnableFirewall>false</EnableFirewall>
        </component>
    </settings>
    <settings pass="specialize">
        <component name="Microsoft-Windows-Shell-Setup" processorArchitecture="amd64" publicKeyToken="31bf3856ad364e35" language="neutral" versionScope="nonSxS" xmlns:wcm="http://schemas.microsoft.com/WMIConfig/2002/State" xmlns:xsi="http://www.w3.org/2001/XMLSchema-instance">
            <ComputerName>Packer</ComputerName>
        </component>
    </settings>
    <settings pass="oobeSystem">
        <component name="Microsoft-Windows-Shell-Setup" processorArchitecture="amd64" publicKeyToken="31bf3856ad364e35" language="neutral" versionScope="nonSxS" xmlns:wcm="http://schemas.microsoft.com/WMIConfig/2002/State" xmlns:xsi="http://www.w3.org/2001/XMLSchema-instance">
            <OOBE>
                <ProtectYourPC>3</ProtectYourPC>
                <HideEULAPage>true</HideEULAPage>
                <HideLocalAccountScreen>true</HideLocalAccountScreen>
                <HideOEMRegistrationScreen>true</HideOEMRegistrationScreen>
                <HideWirelessSetupInOOBE>true</HideWirelessSetupInOOBE>
                <HideOnlineAccountScreens>true</HideOnlineAccountScreens>
            </OOBE>
            <UserAccounts>
                <AdministratorPassword>
                    <Value>QQBkAG0AaQBuAGkAcwB0AHIAYQB0AG8AcgBQAGEAcwBzAHcAbwByAGQA</Value>
                    <PlainText>false</PlainText>
                </AdministratorPassword>
                <LocalAccounts>
                    <LocalAccount wcm:action="add">
                        <Password>
                            <Value>UwB0AGEAcgB0ADEAMgAzACEAUABhAHMAcwB3AG8AcgBkAA==</Value>
                            <PlainText>false</PlainText>
                        </Password>
                        <DisplayName>virtuallabspl</DisplayName>
                        <Name>virtuallabspl</Name>
                        <Group>Administrators</Group>
                    </LocalAccount>
                </LocalAccounts>
            </UserAccounts>
            <AutoLogon>
                <Password>
                    <Value>UwB0AGEAcgB0ADEAMgAzACEAUABhAHMAcwB3AG8AcgBkAA==</Value>
                    <PlainText>false</PlainText>
                </Password>
                <LogonCount>2</LogonCount>
                <Enabled>true</Enabled>
                <Username>virtuallabspl</Username>
            </AutoLogon>
            <TimeZone>Central European Standard Time</TimeZone>
            <FirstLogonCommands>
                <SynchronousCommand wcm:action="add">
                    <Order>1</Order>
                    <CommandLine>e:\setup64.exe /S /v "/qn ADDLOCAL=ALL"</CommandLine>
                </SynchronousCommand>
                <SynchronousCommand wcm:action="add">
                    <Order>2</Order>
                    <CommandLine>powershell.exe Set-ExecutionPolicy Unrestricted -force</CommandLine>
                </SynchronousCommand>
                <SynchronousCommand wcm:action="add">
                    <Order>3</Order>
                    <CommandLine>powershell -ExecutionPolicy Bypass -File a:\Config_WinRM.ps1</CommandLine>
                </SynchronousCommand>
            </FirstLogonCommands>
        </component>
        <component name="Microsoft-Windows-International-Core" processorArchitecture="amd64" publicKeyToken="31bf3856ad364e35" language="neutral" versionScope="nonSxS" xmlns:wcm="http://schemas.microsoft.com/WMIConfig/2002/State" xmlns:xsi="http://www.w3.org/2001/XMLSchema-instance">
            <UILanguage>en-US</UILanguage>
            <SystemLocale>en-US</SystemLocale>
            <UILanguageFallback>en-US</UILanguageFallback>
            <UserLocale>en-US</UserLocale>
            <InputLocale>0409:00000409</InputLocale>
        </component>
    </settings>
    <cpi:offlineImage cpi:source="wim://windows10_v2/install.wim#Windows 10 Pro" xmlns:cpi="urn:schemas-microsoft-com:cpi" />
</unattend>